A POS (Point of Sale) system is one of the most important tools in a modern restaurant.
Whether you’re opening a coffee shop, pizza restaurant, bubble tea store, or quick-service restaurant, a properly configured POS system helps manage orders, payments, inventory, and customer transactions efficiently.
However, many restaurant owners are unsure where to begin.
What hardware do you need?
How do you connect printers?
How should the network be configured?
How do you train staff?
In this guide, we’ll walk through the complete process of setting up a POS system for a restaurant in 2026.
What Is a POS System?
A POS system combines hardware and software to process sales transactions and manage daily restaurant operations.
A typical restaurant POS setup includes:
- POS terminal
- POS software
- Receipt printer
- Cash drawer
- Customer display
- Payment terminal
- Kitchen printer or Kitchen Display System (KDS)
- Network connection
Together, these components create a complete restaurant management system.
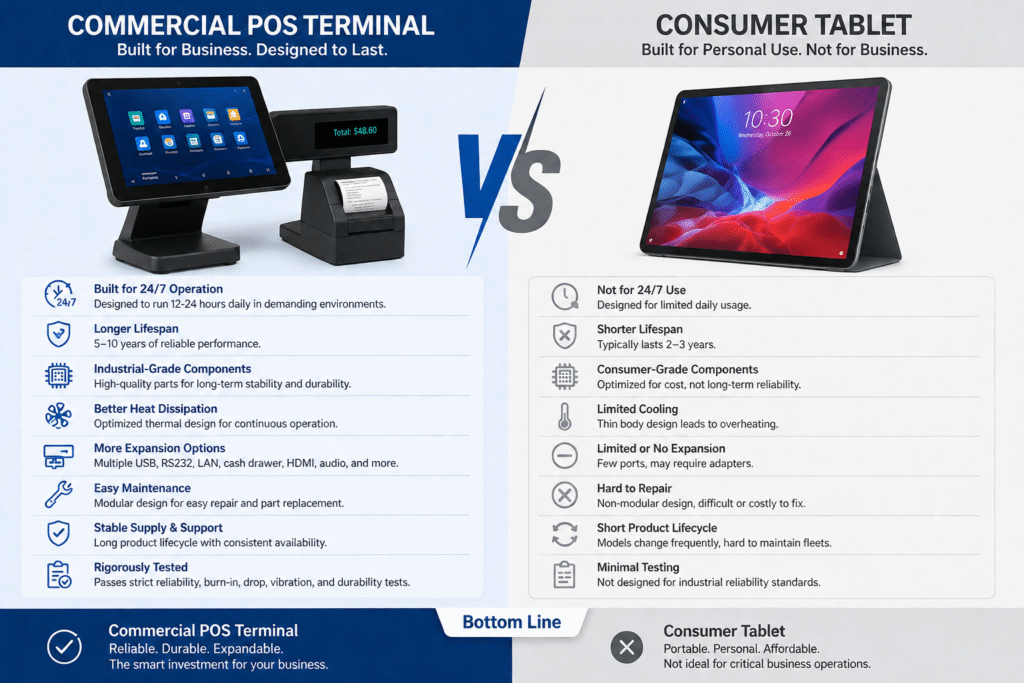
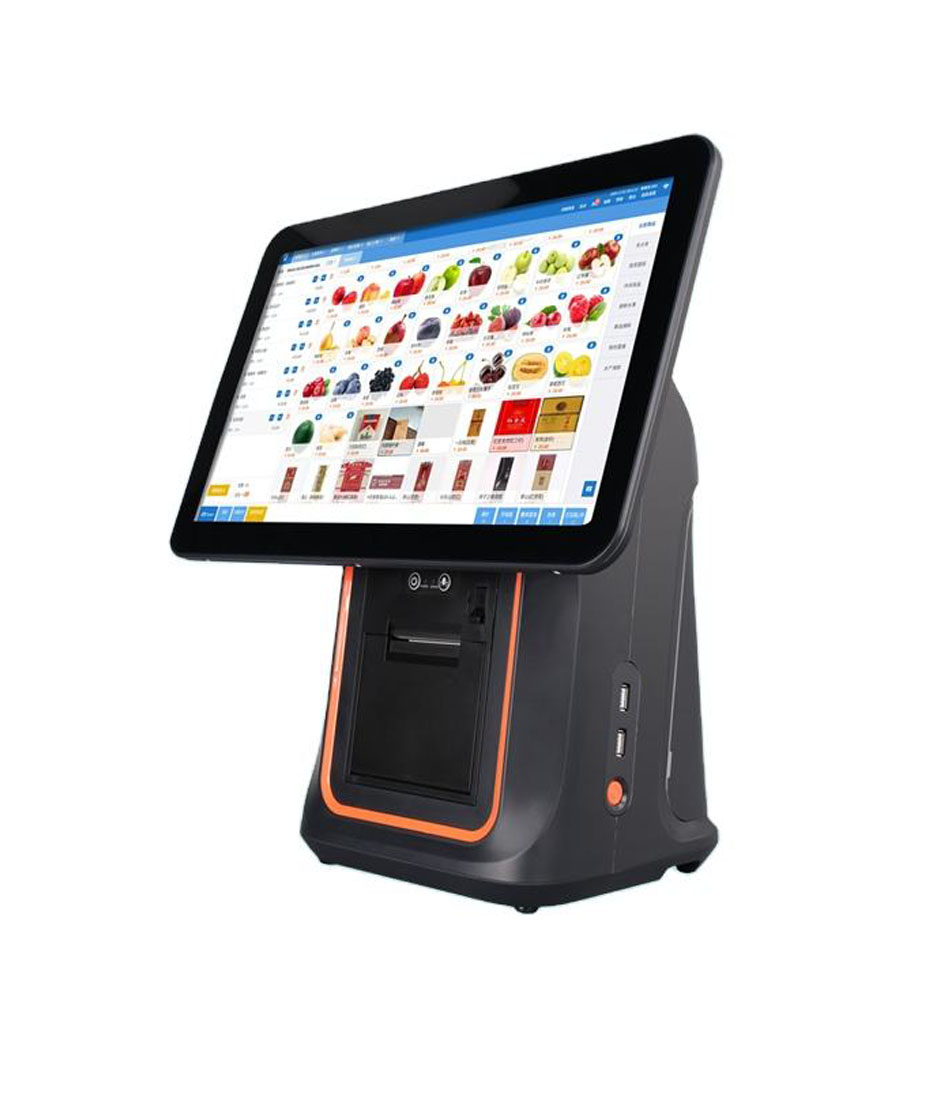
Step 1: Choose the Right POS Hardware
Before installing software, select hardware that matches your restaurant’s needs.
Common restaurant POS hardware includes:
Countertop POS Terminal
Best for:
- Main cashier station
- Fast-food restaurants
- Coffee shops
- Pizza restaurants
Benefits:
- Stable operation
- Large touchscreen
- Multiple peripheral connections
POS Tablet System
Best for:
- Small restaurants
- Cafés
- Mobile operations
Benefits:
- Compact design
- Lower startup cost
- Flexible deployment
Handheld POS Terminal
Best for:
- Table service
- Outdoor dining
- Mobile ordering
Benefits:
- Staff mobility
- Faster ordering
- Table-side payment
Self-Ordering Kiosk
Best for:
- High-volume restaurants
- Quick-service chains
Benefits:
- Reduced queues
- Increased upselling
- Improved customer experience
Choose hardware based on your restaurant workflow rather than price alone.
Step 2: Install the POS Software
Once hardware is ready, install your POS software.
Most modern restaurant POS systems support:
- Android
- Windows
- Cloud-based management
Typical setup includes:
- Create administrator account
- Configure business information
- Set tax rules
- Add restaurant locations
- Configure employee permissions
The software should reflect your actual business structure.
Step 3: Create Your Menu
Your menu is the foundation of the POS system.
Add:
- Categories
- Products
- Pricing
- Modifiers
- Combo meals
- Promotions
Example:
Pizza
- Small
- Medium
- Large
Modifiers:
- Extra Cheese
- Mushrooms
- Pepperoni
- Bacon
A well-organized menu improves ordering speed and reduces mistakes.
Step 4: Configure Payment Methods
Modern restaurants often accept multiple payment options.
Configure:
- Cash
- Credit card
- Debit card
- QR payment
- Mobile wallet
- Contactless payment
Verify that all payment methods are working correctly before opening.
Fast and reliable payment processing improves customer experience.
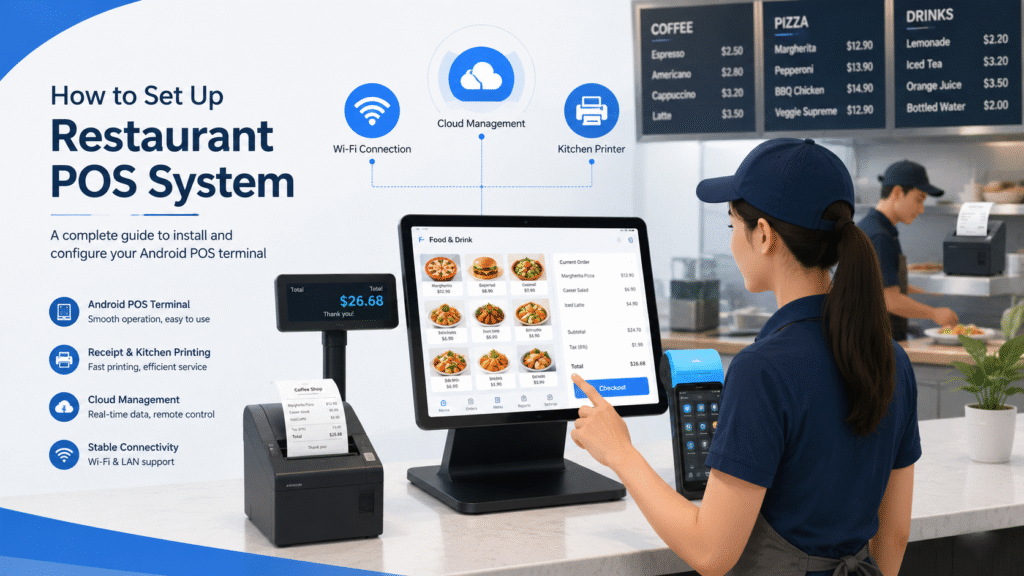
Step 5: Connect Receipt Printers
Most restaurants use thermal receipt printers.
Typical printer locations:
Front Counter
Used for:
- Customer receipts
- Payment confirmations
Kitchen
Used for:
- Kitchen order tickets
- Food preparation instructions
Test every printer connection before launch.
Printer issues are among the most common POS setup problems.
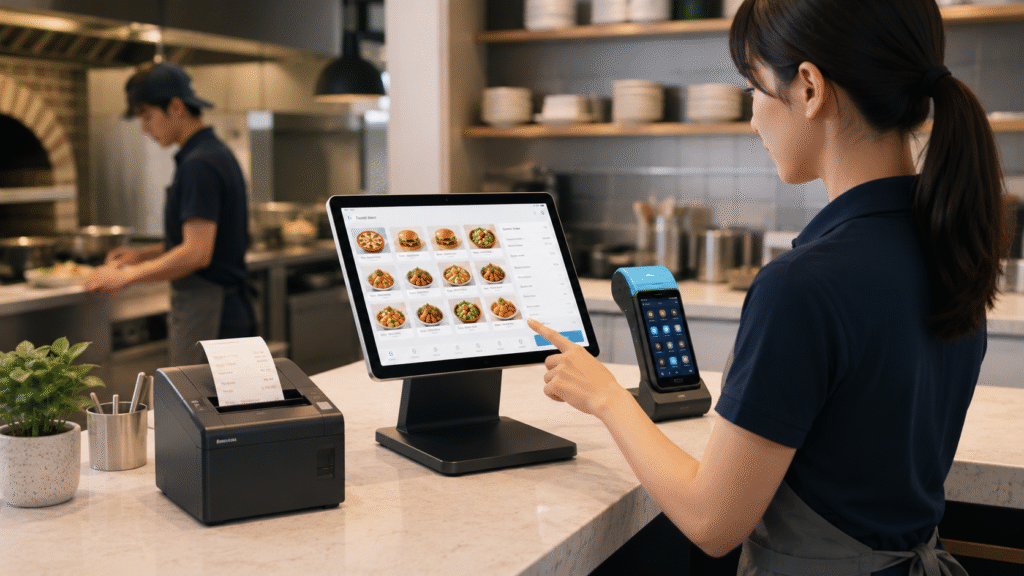
Step 6: Connect Kitchen Displays or Kitchen Printers
Restaurants often use:
Kitchen Printer
Prints paper order tickets.
Kitchen Display System (KDS)
Displays orders digitally.
KDS offers advantages such as:
- Real-time updates
- Better visibility
- Reduced paper usage
Many modern restaurants prefer digital kitchen displays.
Step 7: Set Up the Network
A reliable network is essential.
Most POS systems use:
- Wi-Fi
- Ethernet
- Cloud synchronization
Best practices:
- Use business-grade routers
- Separate guest Wi-Fi
- Enable automatic backups
- Test network stability
A weak network can affect payments and order processing.
Step 8: Configure Employee Permissions
Different staff members need different access levels.
Common roles include:
Manager
Access to:
- Reports
- Inventory
- Pricing changes
Cashier
Access to:
- Order entry
- Payment processing
Kitchen Staff
Access to:
- Order information
Role-based permissions improve security and accountability.
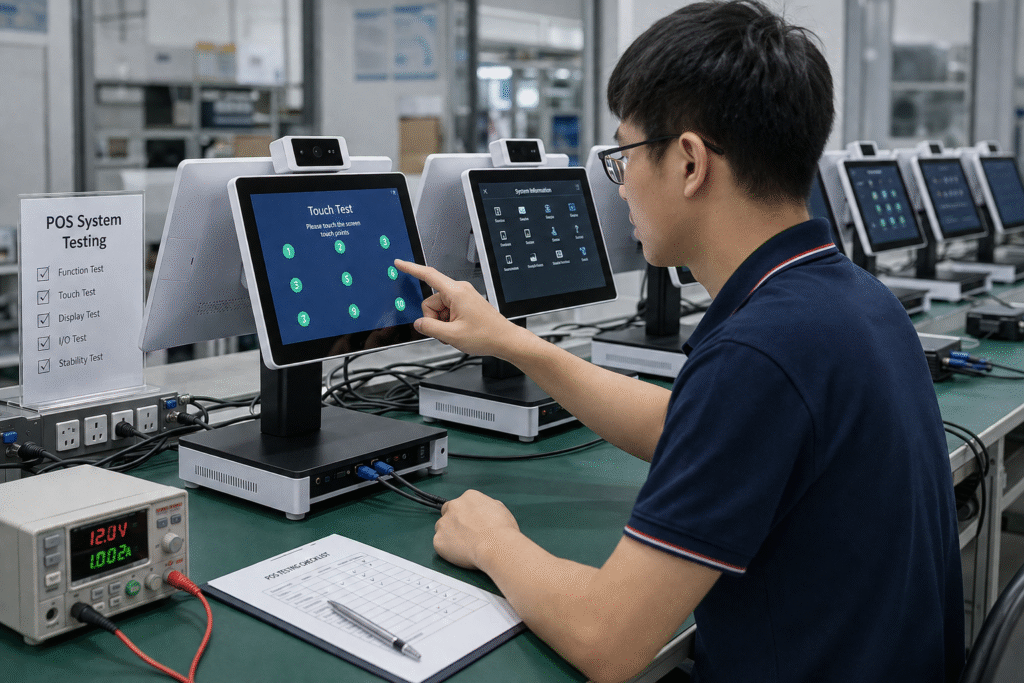
Step 9: Test the Entire Workflow
Before opening, perform a complete test.
Check:
- Order entry
- Payment processing
- Receipt printing
- Kitchen communication
- Refund process
- Customer display
Testing helps identify problems before customers arrive.
Step 10: Train Your Staff
Even the best POS system requires proper training.
Focus on:
- Order entry
- Discounts
- Refunds
- Payment methods
- Customer service workflow
Simple training sessions can dramatically improve operational efficiency.
Common POS Setup Mistakes to Avoid
Many restaurants make the same mistakes.
Choosing Hardware Based Only on Price
Cheap hardware often leads to long-term problems.
Ignoring Network Quality
POS systems rely heavily on stable connectivity.
Poor Menu Organization
Complicated menus slow down service.
Not Training Staff
Untrained staff create delays and errors.
Skipping System Testing
Always test before launch day.
Sample Restaurant POS Hardware Setup
A typical restaurant setup may include:
Front Counter
- Android POS Terminal
- Receipt Printer
- Cash Drawer
- Customer Display
Dining Area
- Handheld POS Devices
Kitchen
- Kitchen Display System
- Kitchen Printer
Self-Service Area
- Self-Ordering Kiosk
This configuration supports efficient restaurant operations and future growth.
FAQ
How long does it take to set up a POS system?
Most restaurant POS systems can be installed within a few hours, but full configuration and staff training may take several days.
What hardware is needed for a POS system?
Common hardware includes a POS terminal, printer, cash drawer, payment device, and kitchen display or printer.
Can I use a tablet as a POS system?
Yes. Many restaurants use tablet POS systems, especially smaller businesses.
Is Android POS easier to set up than Windows POS?
In most cases, Android POS systems are faster to deploy and easier to maintain.
Final Thoughts
Setting up a POS system is more than simply installing software.
A successful POS deployment requires the right combination of hardware, software, network infrastructure, and staff training.
By following a structured setup process, restaurants can improve order accuracy, speed up service, and create a better customer experience.
Whether you’re opening a new restaurant or upgrading an existing location, investing time in proper POS setup will pay off through smoother operations and long-term business growth.
Looking for Restaurant POS Hardware?
DCAPOS provides Android POS hardware solutions for:
- Restaurants
- Coffee Shops
- Pizza Restaurants
- Bubble Tea Stores
- Quick-Service Chains
- POS Software Companies
Available support includes:
- OEM / ODM customization
- Android firmware customization
- SDK integration
- Logo branding
- Fast sample delivery
- Global shipping
Contact our team to discuss your restaurant POS hardware project.