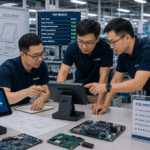
It’s normal to feel nervous when you use a pos machine or a pos terminal machine for the first time. You’re definitely not alone—about 35% of stores worldwide use a pos machine or pos terminal machine every day. Most beginners need a few months to get comfortable with these devices. As you practice, you’ll notice your skills with the pos machine and pos terminal machine improve.
Tip: You might make mistakes at first, but every transaction on the pos machine or pos terminal machine helps you learn and feel more confident.
Key Takeaways
- First, set up your POS machine with care. Turn it on. Connect all the hardware parts. Install the software by following the steps.
- Add items to the sale by scanning barcodes. You can also search for items by hand. Always check the total with the customer before they pay.
- Take many payment types like cards, cash, and mobile wallets. This helps customers shop easily and can help you sell more.
- For returns, find the first sale in the system. Give refunds by your store’s rules.
- At the end of each day, close your register. Count the cash carefully. Run reports. Keep your system updated to stop problems.
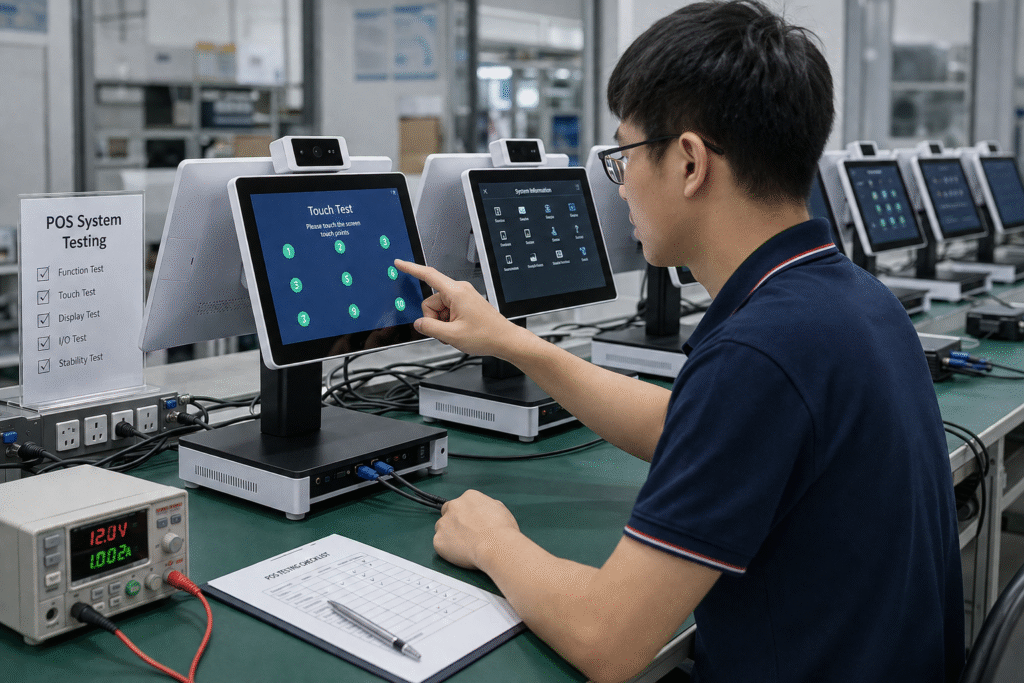
Setup
Power On
Start by looking for the power button on your pos machine or pos terminal machine. Plug it into a wall outlet. If it uses a battery, make sure it is charged. When you turn it on, you might see a light or hear a beep. Wait until the screen shows the startup logo. If the screen stays off, check the power cord and try again.
Tip: Keep your pos machine or pos terminal machine plugged in when it gets busy. This stops it from turning off by accident.
Connect Hardware
You must connect some important parts before using the machine. Most setups need these:
- Touchscreen monitor or display
- Receipt printer (thermal or dot-matrix)
- Cash drawer
- Barcode scanner
- Card reader for payments
- Keyboard and mouse (sometimes optional)
- Customer-facing display (optional)
Plug each part into the right spot on your pos machine or pos terminal machine. Make sure every cable is tight. If you work in a restaurant, you may also use a kitchen display system.
Install POS Software
Next, you need to put the software on your machine. Download the POS software from your vendor’s website or use the USB drive they give you. Before you start, check if your computer has these things:
| Component | Minimum Requirement |
|---|---|
| Processor | Dual Core, 2.0 GHz or higher |
| Memory | 4GB RAM or more |
| Hard Disk | 80GB or larger |
| Operating System | Windows 10 (Professional, Enterprise, Ultimate) |
| Monitor | 1366 x 768 resolution |
| Internet | Broadband, at least 5 Mbps |
Follow the steps on the screen to finish installing. If you have trouble, ask your vendor for help.
Log In
When the software is ready, open it. Type in your username and password. You will see the main dashboard. Here, you can manage sales, check inventory, and take payments. If you forget your password, click “Forgot Password” or ask your manager for help.
POS Machine and POS Terminal Machine Configuration
Configure Payment Methods
You want your pos machine pos terminal machine to take many payment types. This helps customers pay in ways they like. Most small stores let people pay with:
- Credit and debit cards
- Digital wallets like Apple Pay and Google Pay
- PayPal and Venmo
- Cash
You can link your pos machine pos terminal machine to payment processors like Shopify Payments, Square, Stripe, or Clover. These help you take both contactless and card payments. If you want to use PayPal or Venmo, add a payment gateway like PayPal Express Checkout. Always ask your vendor for setup steps.
Tip: More payment choices make customers happy and boost sales!
Check Internet Connection
A strong internet keeps your pos machine pos terminal machine working well. You need it for fast payments and updates. Here is a simple guide for internet speed:
| POS Terminals / Devices | Download Speed (Mbps) | Upload Speed (Mbps) |
|---|---|---|
| 1-3 POS Terminals | 6 | 1 |
| 4-6 POS Terminals | 10 | 2 |
| 4-6 POS Terminals + Waivers kiosks | 15+ | 3+ |
| EMV Devices (baseline) | 5 | 5 |
Pick an internet provider with good uptime and support all day. This helps you avoid problems and keeps sales going.
Update Software and Firmware
You should update your pos machine pos terminal machine software often. Updates keep your system safe from hackers. Try to check for updates every month. Make a schedule and turn on automatic updates if you can. Test updates on a backup system first, so you do not have issues when busy.
- Updates keep your data safe.
- Updates help you follow the rules.
- Automatic updates save time.
Note: Update your system when the store is closed. This stops sales from being interrupted.
Sales
Add Items
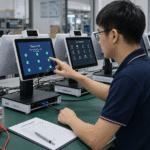
You start every sale by adding items to the cart. Scan each product’s barcode with the scanner. If an item does not have a barcode, you can search for it by name or SKU on the screen. Some pos machine pos terminal machine setups let you tap the item on a touchscreen menu. Double-check the item name and price before you move on. This step helps you avoid mistakes and keeps your inventory accurate.
Tip: If you scan the wrong item, just tap “Remove” or “Void” to fix it fast.
Many beginners make small errors here. You might enter the wrong quantity or forget to scan an item. These mistakes can slow down the line and mess up your inventory. Here are some common errors to watch out for:
- Not enough training, which leads to slow checkouts and order entry mistakes.
- Only using basic POS features and missing out on tools that save time.
- Poor inventory tracking, which can cause you to run out of stock or over-order.
- Skipping regular updates, which can make your system slow or unsafe.
- Weak security, like using easy passwords or not setting user permissions.
Confirm Total
Once you add all the items, check the total on the screen. The pos machine pos terminal machine will show the subtotal, taxes, and any discounts. Ask the customer if everything looks right. This is your chance to fix mistakes before you take payment.
You can also apply coupons or loyalty points at this stage. If the customer has a membership or discount code, enter it now. The system will update the total automatically.
Note: Always confirm the total with the customer. This builds trust and helps avoid problems later.
Accept Payment
Now you’re ready to take payment. Most customers pay with a card, but some still use cash or mobile wallets. Tap the “Pay” button on the screen. Choose the payment type the customer wants.
- For cards, insert, swipe, or tap the card on the reader.
- For cash, enter the amount given and the system will show the change.
- For mobile payments, ask the customer to hold their phone near the reader.
If the payment goes through, you’ll see a confirmation on the screen. Sometimes, you might run into hardware or software errors. For example, the printer might not work, or the touchscreen might freeze. If this happens, check the cables, clean the screen, or restart the device. Make sure your payment settings are correct so you don’t miss out on card sales.
A typical sales transaction takes about 36 seconds. If the customer has more items, it might take a bit longer. For example, a basket with four items usually takes around 52 seconds. Most of the time, the speed depends on how many items you scan and how quickly you and the customer interact.
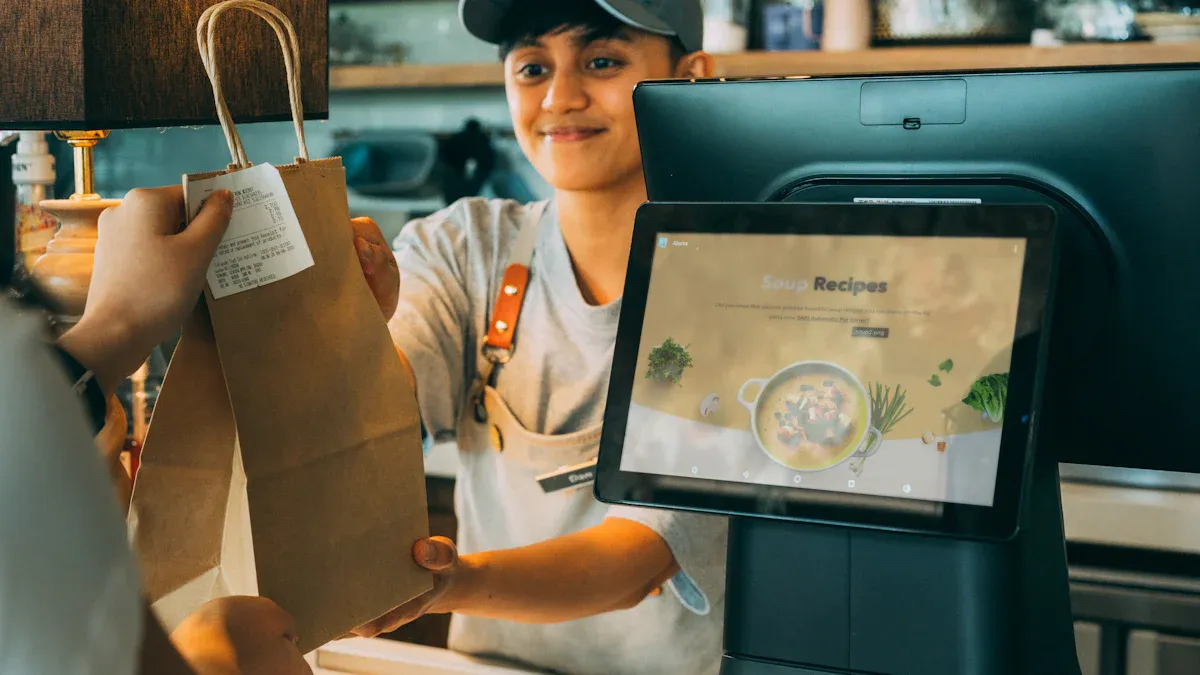
Print or Send Receipt
After you finish the payment, you need to give the customer a receipt. Ask if they want a printed copy or a digital one sent to their email or phone. Many people now prefer digital receipts, but some still want paper.
Here’s what recent surveys show about customer preferences:
| Survey Finding | Percentage (%) | Notes |
|---|---|---|
| Want digital receipt option | 86 | 2021 Censuswide survey |
| Already signed up for digital receipts | 44 | Among those with option |
| Often discard paper receipts | 32 | Shows dislike for paper receipts |
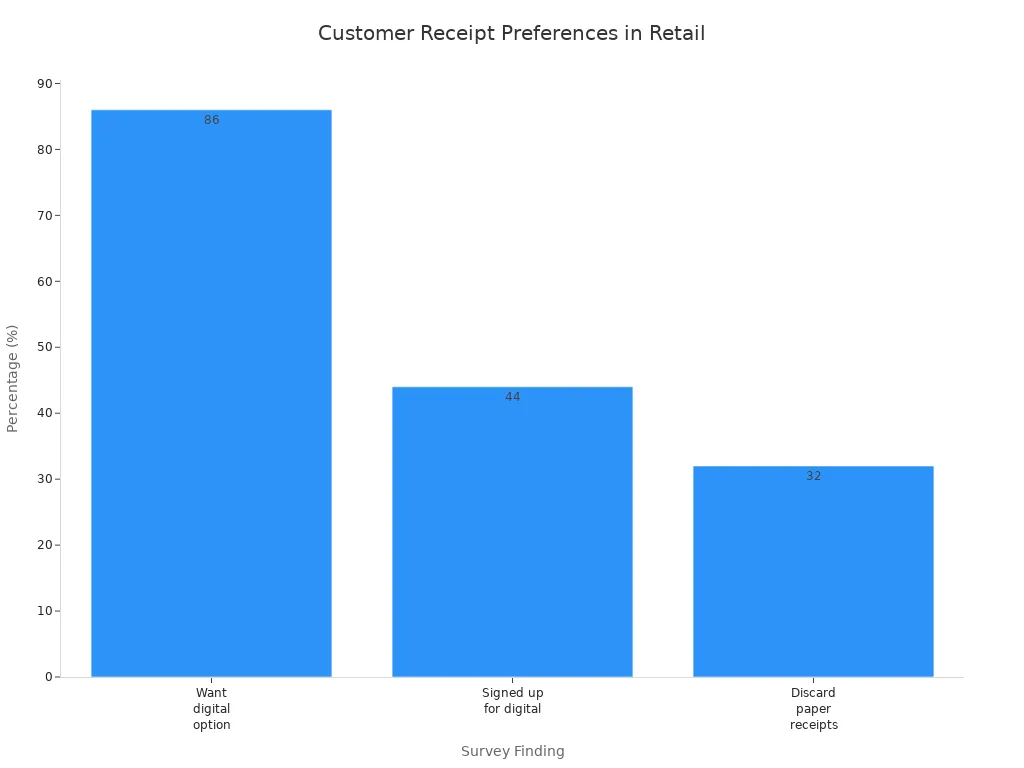
Younger customers often choose digital receipts, while older shoppers may still want a printed copy. Always offer both options if you can. If the printer does not work, check the paper roll or restart the printer. If you send a digital receipt, make sure you enter the correct email or phone number.
Tip: Offering digital receipts saves paper and makes customers happy. It also helps you keep records organized.
Payment Types
When you use a POS cashier machine, you can accept many types of payments. This makes shopping easier for your customers and helps you make more sales. Let’s look at the most common payment types you’ll see at the register.
Card Payments
Card payments are the most popular way people pay in stores today. You’ll see customers use both credit and debit cards. In fact, about 40% of in-store transactions use credit cards, and these cards account for nearly three-quarters of all retail sales dollars. People like cards because they are fast and accurate. You just insert, swipe, or tap the card on your POS terminal.
Tip: Always check your card reader for any signs of tampering before you start your shift.
To keep card payments safe, you should:
- Inspect your POS terminals daily for anything unusual.
- Change default passwords right after setup.
- Use strong encryption to protect cardholder data.
- Update your POS software and hardware often.
- Only let trained staff access the POS system.
These steps help protect your store and your customers from fraud.
Cash Payments
Cash is simple and easy to use. Some customers still prefer it, especially for small purchases. Right now, cash makes up about 16% of retail transactions in North America, but this number is slowly dropping. Most people spend less when they pay with cash—the average cash sale at a POS machine is about $22.
You just enter the amount given, and the POS system tells you how much change to give back. Always count the cash in front of the customer to avoid mistakes.
Note: Cash is still important, even as more people use cards and phones to pay.
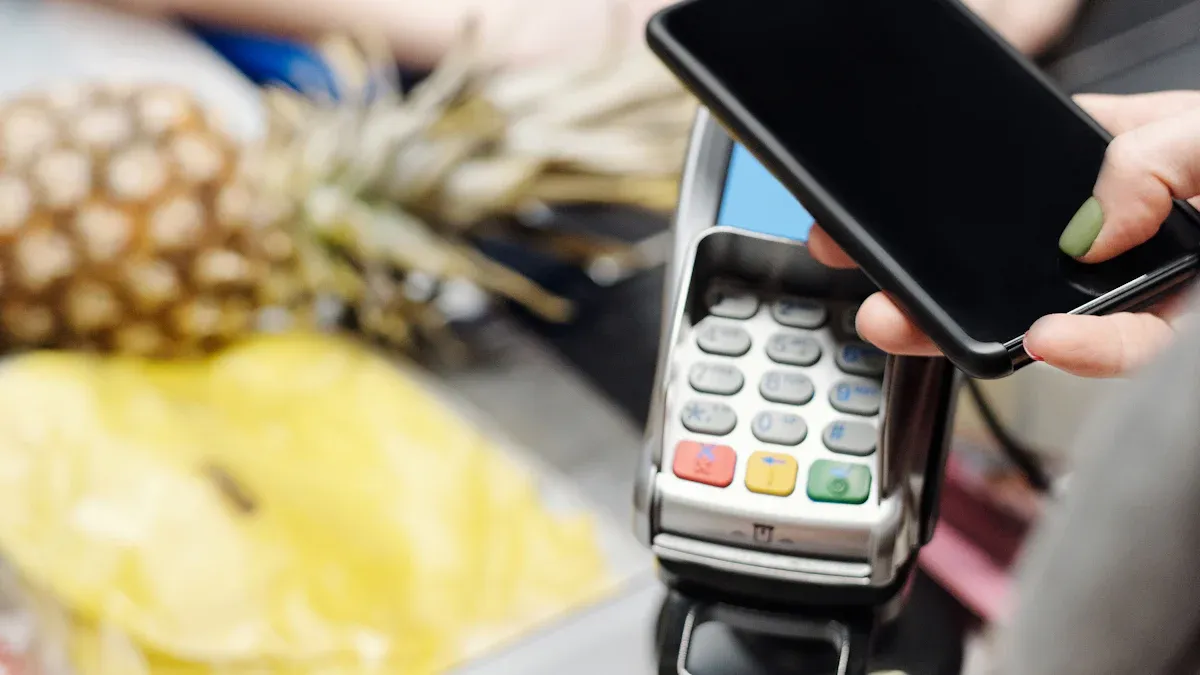
Mobile Payments
Mobile payments are growing fast, especially with younger shoppers. Customers can pay using their smartphones or smartwatches. They just tap their device on your POS terminal using apps like Apple Pay or Google Pay. Many POS systems now work with platforms such as Square, Clover, PayPal Zettle, and Shopify. These tools make it easy to accept contactless payments and manage your sales.
Mobile payments are quick and secure. They also help you serve customers who don’t want to carry cash or cards.
Offering more payment options makes your store a favorite for more shoppers!
Returns
Access Transaction History
When a customer wants to return an item, you need to find the original sale first. Your POS system keeps a record of every transaction. You can look up sales by date, receipt number, or even the customer’s name. Most POS dashboards have a “Sales History” or “Transactions” button. Tap it to see a list of recent sales.
If you remember the date or time of the sale, scroll to that day. Some systems let you search by scanning the receipt’s barcode. If the customer lost their receipt, you can still search by their payment card or name if they used a loyalty account.
Tip: Always double-check the details before you start a return. This helps you avoid refunding the wrong sale.
Process Refund
You can process refunds in a few different ways, depending on your POS system and the situation. Here’s a simple step-by-step guide you can follow for most POS cashier machines:
- Enable Refunds: Make sure your POS terminal has refunds turned on in the settings.
- Find the Sale: Go to your transaction history and select the sale you want to refund.
- Select Items: Choose the items the customer wants to return. Some systems let you restock these items automatically.
- Start the Refund: Tap the refund or return button. The POS will ask you to pick the original payment method, like cash, card, or mobile wallet.
- Complete the Refund: For card payments, the customer may need to present their card. Some cards allow refunds without the card present. For cash, just hand back the money.
- Print or Send Receipt: The POS will print a refund receipt or let you send it by email or text.
If the customer does not have a receipt, some POS systems let you process an “unreferenced refund.” You start a new refund, enter the amount, and choose the payment method. Some stores offer refunds to gift cards if the original payment method is not available.
Note: Always follow your store’s refund policy. Some refunds may need a manager’s approval or have limits on the amount.
Refunds help keep your customers happy and show that your store is trustworthy. With practice, you’ll handle returns quickly and with confidence.
End of Day
Close Register
When your shift ends, you need to close the register. This step keeps your records accurate and helps you avoid mistakes. Start by finding the “Close Register” or “Close the Day” option in your POS menu. The system will guide you through each step.
- Count all the cash in your drawer, including coins and bills.
- Enter the total amount into the POS.
- The system will show you the expected amount. If there’s a difference, double-check your math and receipts.
- Enter the opening cash amount you want to leave for the next shift.
- The POS will calculate how much cash you need to remove and deposit.
- Add any notes if you need to explain a difference.
- Confirm and finish the close-out.
Tip: Always close out your register at the end of each day. This keeps your cash balances right and makes future audits easier.
Run Reports
After you close the register, it’s time to run your end-of-day reports. These reports help you see how your day went and spot any problems.
Here are some common reports you might use:
- POS Z Report (Close Report): Shows total sales, payment types, refunds, discounts, and taxes.
- Daily Summary Report: Gives a quick look at sales by product and payment type.
- Detailed Product Sales Report: Breaks down sales by each item.
- Gift Card Sales Report: Tracks gift card activity.
- Invoices Report: Lists all invoices and payment status.
You can print these reports or save them for your records. Some POS systems even send reports to your email automatically.
Note: Reviewing your reports daily helps you catch mistakes early and keeps your business running smoothly.
Secure Cash
Now you need to handle the cash safely. Always follow your store’s cash handling rules. Use a two-person team to count the cash for extra accuracy. Compare your counted cash with the POS report and write down any differences.
- Place the cash in a tamper-evident bag or envelope.
- Store the cash in a safe or vault that only trusted staff can access.
- Both you and a supervisor should sign off on the final cash balance.
- If you notice any problems, tell your manager right away.
🚨 Always stay alert when handling cash. Secure cash drops and good records help protect you and your store from loss.
Tips
Avoid Mistakes
It is normal to make mistakes when you first use a POS cashier machine. You can stop most problems if you know what to look for. Here are some mistakes beginners often make and how you can avoid them:
- Forgetting to check connections: Always check that your printer, scanner, and card reader are plugged in before you start.
- Entering the wrong item or price: Look at each item as you scan or enter it. If you see a mistake, press the “Remove” or “Void” button right away.
- Skipping daily updates: Update your POS software and hardware often. This keeps your system safe and working well.
- Not backing up data: Make regular backups. This protects your sales and customer information if something goes wrong.
- Ignoring user permissions: Only let trained staff use the POS. Set up user roles so no one can change settings by mistake.
- Missing cash counts: Count your cash drawer at the start and end of every shift. This helps you find mistakes quickly.
Tip: Go slow when you are new. If you rush, you will make more mistakes.
Troubleshooting
Sometimes, things do not work right. Do not worry! Most POS problems are easy to fix. Here is a quick guide to help you solve common issues:
| Problem | What Might Be Wrong | What You Can Do |
|---|---|---|
| POS won’t turn on | Power or hardware issue | Check power cord, restart, update software |
| Can’t connect to internet | Network or router problem | Restart router, check cables, call provider |
| Printer not working | Paper jam or connection issue | Check paper, clear jams, reconnect cables |
| Scanner not reading barcodes | Dirty lens or loose cable | Clean scanner, check USB, adjust settings |
| Touchscreen not responding | Dirty screen or needs calibration | Clean screen, recalibrate, restart device |
| Software keeps crashing | Outdated software or low memory | Update software, close other apps, upgrade RAM |
If your POS goes offline, try restarting the device or service. For payment problems, check that “Offline card payments” is turned off. If menus or items are missing, reassign the POS device in your settings. Always use your store’s troubleshooting guides for printers and cash drawers.
Note: Keep your vendor’s support number close. Sometimes, you need expert help fast!
You now know how to use a POS cashier machine. You learned setup, sales, returns, and closing your shift. Practice these steps many times. You will make mistakes sometimes. Each sale helps you improve your skills.
- Do hands-on training with real examples.
- Pay attention to security and help customers.
- Use CRM tools to keep customers coming back.
- Always be ready to learn new things.
- Keep a quick guide close to you.
- Ask other cashiers for helpful advice.
- Look at this guide if you forget something.
Remember, being patient and practicing will make you great!
FAQ
How do you reset your POS cashier machine if it freezes?
If your POS freezes, press and hold the power button for 10 seconds. Wait for it to turn off. Turn it back on. If it still does not work, call your vendor’s support team.
Tip: Restarting usually fixes most freezing problems.
Can you use your POS machine without the internet?
Yes, you can process cash sales without the internet. Card and mobile payments may not work. Some POS systems let you take offline card payments, but you must upload them when you reconnect.
- Always check your system’s offline features.
- Upload sales as soon as you get back online.
What should you do if the receipt printer runs out of paper?
Open the printer cover. Remove the empty roll. Place a new paper roll inside. Close the cover. Print a test receipt to check if it works. If you see errors, check the paper direction.
Note: Keep extra paper rolls near your register.
How do you protect customer data on your POS system?
You should use strong passwords and change them often. Only let trained staff access the POS. Update your software regularly. Never share login details. Always log out when you finish your shift.
| Security Step | Why It Matters |
|---|---|
| Strong passwords | Stops hackers |
| Regular updates | Fixes security holes |
| User permissions | Limits access |