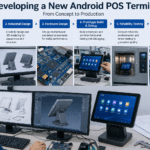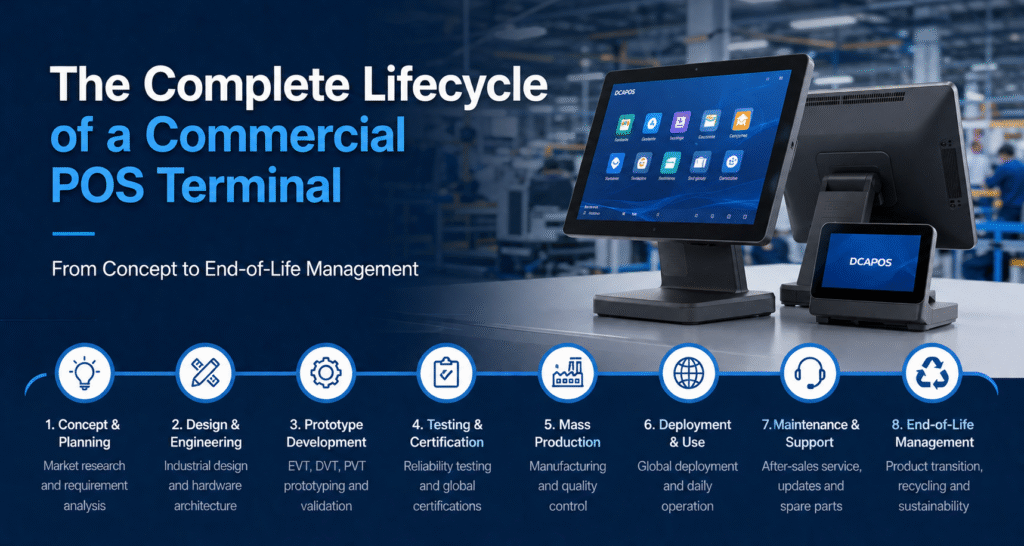
Developing a commercial Android POS terminal is far more complex than assembling a touchscreen and installing an operating system.
Behind every successful POS product is a multidisciplinary process involving market research, industrial design, hardware engineering, software integration, prototyping, testing, manufacturing, and long-term support.
At DCAPOS, developing a new Android POS terminal typically takes several months and requires close collaboration between product managers, engineers, designers, suppliers, and manufacturing teams.
In this article, we’ll take you behind the scenes and show how a commercial Android POS terminal moves from an idea to a finished product.
Step 1: Understanding the Market
Every product starts with a question:
What problem are we trying to solve?
Before development begins, we conduct extensive market research.
Our product team studies:
- Customer requirements
- Industry trends
- Existing products
- Competitor weaknesses
- Emerging technologies
For example:
Restaurant customers may require:
- Dual-screen support
- Kitchen printer connectivity
- NFC payment
- Android 15 compatibility
Retail customers may require:
- Barcode scanner integration
- Customer displays
- Multiple USB interfaces
- Compact design
Understanding the application scenario is the foundation of product development.
Step 2: Defining Product Requirements
After market research, the team creates a Product Requirement Document (PRD).
This document defines:
Hardware Specifications
- Screen size
- CPU platform
- Memory
- Storage
- Interfaces
Software Requirements
- Android version
- SDK support
- OTA updates
- Device management
Mechanical Requirements
- Product dimensions
- Mounting options
- VESA support
- Thermal requirements
The PRD becomes the blueprint for the entire project.
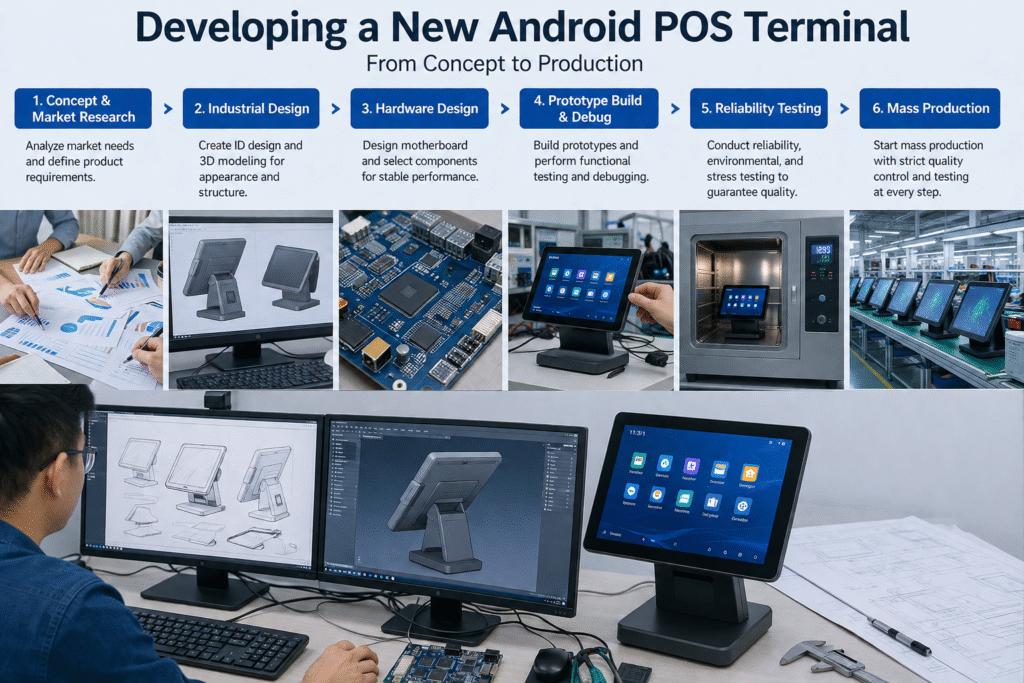
Step 3: Industrial Design
A commercial POS terminal is used every day by cashiers, store managers, and restaurant staff.
Therefore, appearance and usability are extremely important.
The industrial design team develops:
- Product shape
- Screen angle
- Base design
- Cable routing
- Customer display integration
Several concepts are usually created before selecting the final design.
The goal is to combine:
- Functionality
- Aesthetics
- Manufacturing feasibility
At this stage, 3D renderings and CAD models are produced.
Step 4: Mechanical Engineering
Once the design is approved, mechanical engineers begin building the internal structure.
This includes:
- Internal frame design
- Motherboard mounting
- Thermal management
- Stand structure
- Cable channels
Commercial POS terminals must operate continuously for many years.
Engineers therefore perform:
- Structural simulations
- Thermal analysis
- Assembly optimization
- Durability evaluations
Every millimeter matters.
Step 5: Selecting the Hardware Platform
The motherboard is the heart of an Android POS terminal.
Selecting the right platform is critical.
Considerations include:
- CPU performance
- Android roadmap
- Long-term supply
- Power consumption
- Peripheral support
A commercial POS product usually needs to support:
- USB
- RJ45
- HDMI
- Bluetooth
- Wi-Fi
- Serial ports
- Cash drawer interfaces
Choosing the wrong platform can create supply chain risks later.
Step 6: Android System Development
Once hardware is selected, software engineers begin adapting Android.
Typical development work includes:
- Driver integration
- Peripheral support
- Boot optimization
- Firmware customization
- Device management tools
- Security improvements
For OEM projects, additional customization may include:
- Custom launcher
- Logo branding
- Boot animation
- Pre-installed applications
- Remote management functions
Software optimization often continues throughout the entire development cycle.
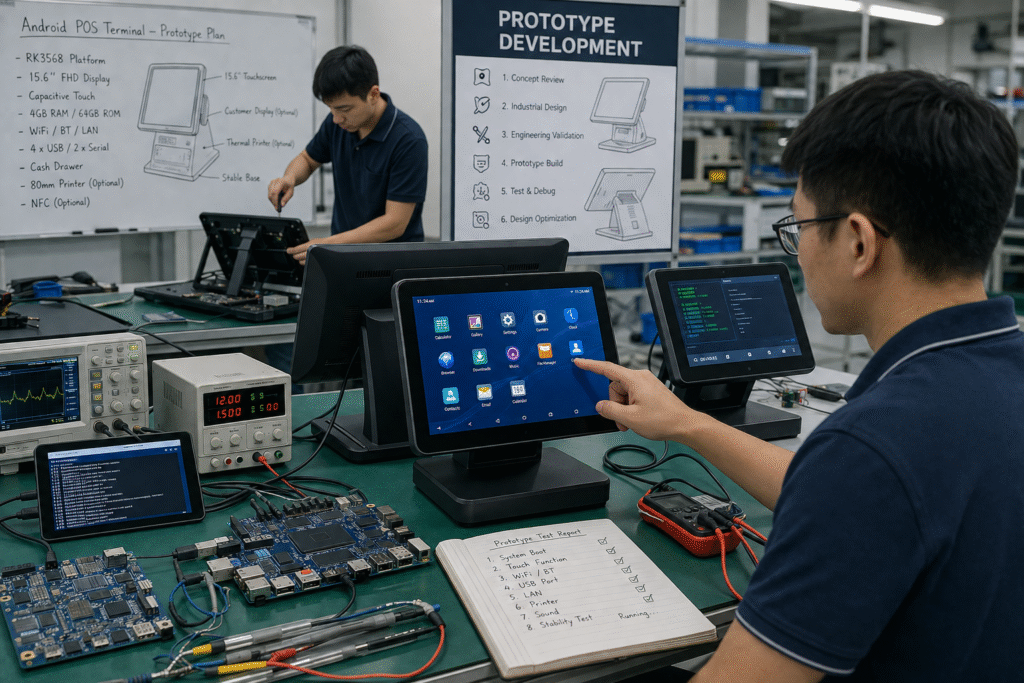
Step 7: Engineering Prototype Development
The first prototypes are then built.
These engineering samples allow teams to verify:
- Basic functionality
- Hardware compatibility
- Mechanical fit
- Software performance
Prototype development usually goes through several stages.
EVT: Engineering Validation Test
Focus:
- Basic functionality
- Hardware verification
- Initial debugging
At this stage, engineers often discover:
- Thermal issues
- Interface problems
- Mechanical conflicts
This is a normal part of development.
DVT: Design Validation Test
Once the basic design is stable, the project enters DVT.
Objectives:
- Mechanical validation
- Reliability improvements
- Cosmetic evaluation
- User experience optimization
The product now begins to resemble the final commercial version.
PVT: Production Validation Test
The final prototype stage focuses on manufacturing readiness.
Objectives include:
- Assembly verification
- Production process validation
- Yield analysis
- Packaging evaluation
Only after PVT approval can mass production begin.
Step 8: Tooling Development
For commercial production, precision tooling is required.
Tooling development includes:
- Injection molds
- Metal stamping tools
- CNC fixtures
- Assembly jigs
Tooling directly affects:
- Product appearance
- Assembly quality
- Manufacturing efficiency
Developing high-quality tooling is one of the most important investments in the entire project.
Step 9: Reliability Testing
Commercial POS terminals are expected to operate for many years.
Before production approval, products undergo extensive testing.
Typical tests include:
High Temperature Test
Ensures stability under hot operating conditions.
Low Temperature Test
Verifies cold-start performance.
Touchscreen Life Test
Simulates years of daily usage.
USB Insertion Test
Evaluates connector durability.
Continuous Operation Test
Runs the system continuously for long periods.
Vibration and Drop Tests
Simulates transportation and handling conditions.
Testing identifies weaknesses before products reach customers.
Step 10: Certification
Most commercial POS terminals require international certifications.
Depending on the market, these may include:
- CE
- FCC
- RoHS
- UKCA
- CCC
Certification ensures compliance with safety and electromagnetic standards.
Step 11: Pilot Production
Before mass production, a pilot run is performed.
Objectives include:
- Process verification
- Operator training
- Yield analysis
- Packaging validation
Pilot production helps eliminate potential manufacturing issues.
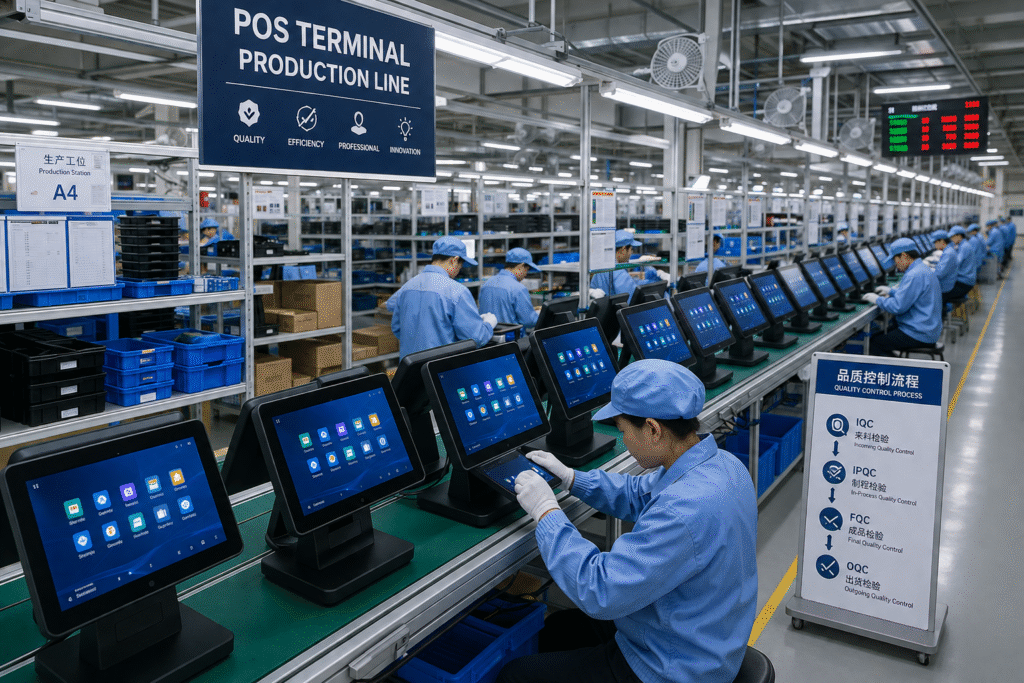
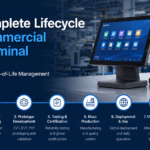
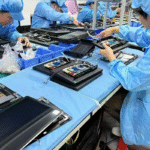
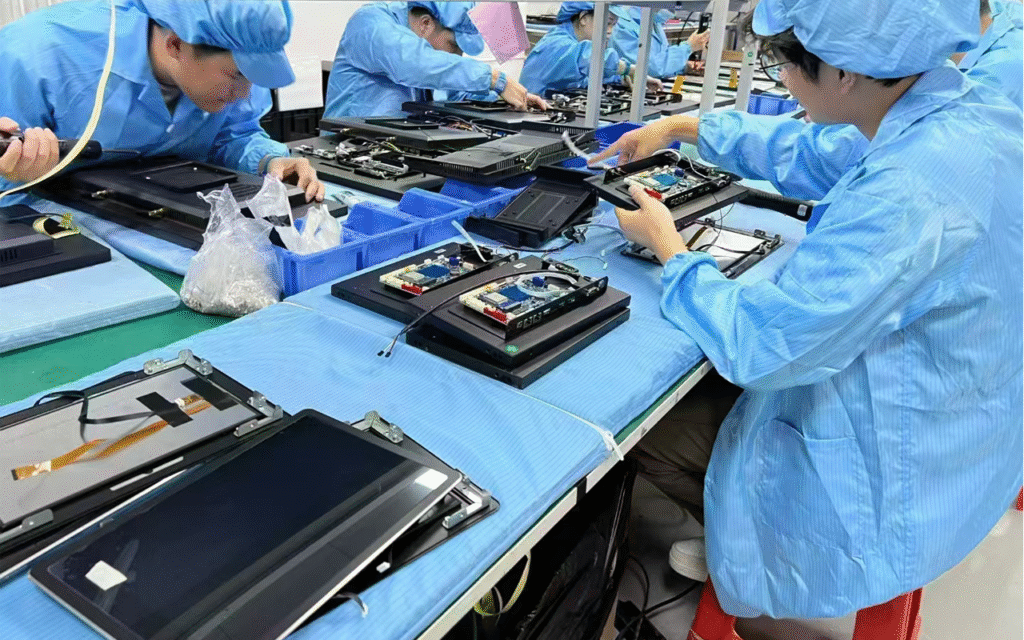
Step 12: Mass Production
After all validation stages are complete, full production begins.
Quality control includes:
IQC
Incoming material inspection.
IPQC
Assembly process monitoring.
FQC
Finished product inspection.
OQC
Final shipment inspection.
Commercial POS systems require strict quality control to ensure long-term reliability.
Step 13: Global Deployment and Support
The product’s lifecycle doesn’t end when it leaves the factory.
Long-term support includes:
- Firmware updates
- Spare parts supply
- Technical support
- SDK maintenance
- Android upgrades
For many commercial customers, product support may continue for five years or more.
Challenges in Developing a New Android POS Terminal
Developing commercial POS hardware presents many challenges:
- Rapid Android version updates
- Supply chain changes
- Certification requirements
- Thermal management
- Long-term component availability
- Software compatibility
A successful product requires careful planning and cross-functional collaboration.
Why Development Experience Matters
Many POS terminals may look similar externally.
However, the engineering process behind the product often determines:
- Reliability
- Stability
- Product lifespan
- Ease of maintenance
- Customer satisfaction
Choosing an experienced development partner significantly reduces project risk.
Final Thoughts
Developing a new Android POS terminal is a long and highly collaborative process that combines engineering, design, manufacturing, and quality management.
From initial market research to mass production and long-term support, every stage contributes to the success of the final product.
At DCAPOS, we believe that reliable POS hardware is built through disciplined engineering, rigorous testing, and continuous improvement.
Because great products don’t happen by accident—they are carefully designed, validated, and manufactured from concept to production.